Homemade Peppermint Patties
December 24, 2013
3 Comments
Merry Christmas Eve!
I wanted to share one more peppermint-chocolate recipe with you before Christmas! Tis the season for peppermint-chocolate and homemade candy 🙂
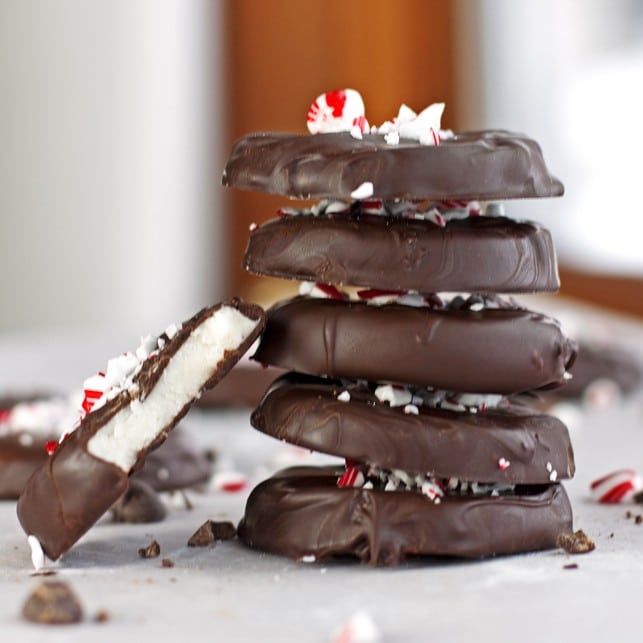
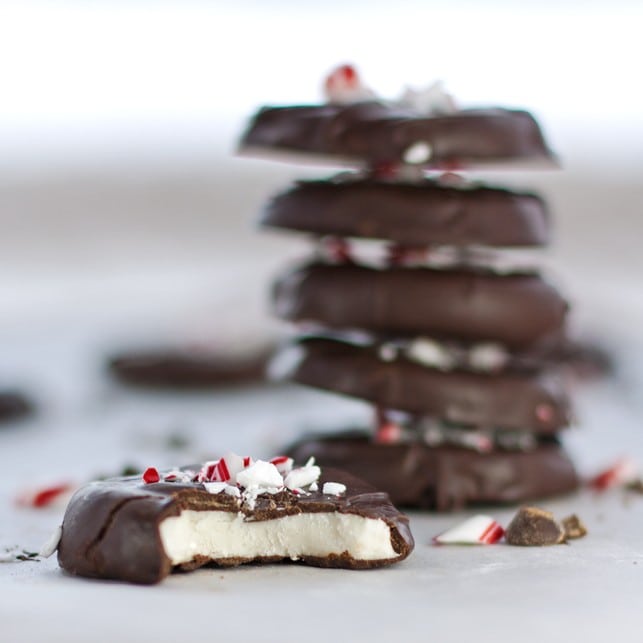
These peppermint patties adapted from Mel’s Kitchen Cafe are great! The recipe uses natural ingredients, including refined coconut oil and honey, and makes a refreshing peppermint center, rich chocolate coating, and an out of this world candy texture!
Candy is a super simple dessert you can make without needing to bake. The first time I made chocolate candy, it was a gift to Chris for our first Valentine’s Day <3. I made homemade peanut butter cups with natural peanut butter and rich dark chocolate. Neither of us had ever eaten homemade candy before and it was love at first bite 🙂
My first batch of these peppermint patties went so fast I actually had to make them again just to get a few photos before they disappeared! I made the first batch with corn syrup, but in the second batch I tried honey instead because I don’t usually keep corn syrup around my kitchen. I totally couldn’t tell the difference. It was yummy peppermint and chocolate all the way through.
Mel mentions that you can use olive oil, but after reading her extensive, compelling explanation of coconut oil I was totally sold on giving it a try! So I bought coconut oil for the first time (I found it in the organic section at my grocery store) and was super impressed with how well it works for the recipe. Coconut oil is solid at room temperature, which helps keep the candy solid as you eat it. I’m excited about finding more yummy uses for the coconut oil, and making more candy 🙂
I’ve found the trickiest part of any candy recipe is melting the chocolate. You want to melt it on really low heat, stirring often, allowing the last chips to be melted by the already melted chocolate, away from the heat. If your melted chocolate is a bit too thick for coating the patties, try thinning it with a little light tasting olive oil. Don’t use cream or butter, which add water to your melted chocolate, causing it seize up and become frosting. This may or may not have happened with my first batch of chocolate….
Once I got the technique down for melting the chocolate and coating the patties it was actually pretty easy to coat the patties, and my only problem in the world was chocolate-covered fingers 🙂
I multiplied the peppermint by a factor of 8, just like with the frosting for my peppermint chocolate cupcakes. I thought it was much more refreshing without being too minty. Definitely taste the peppermint insides as you are making them, and add peppermint to taste. Tasting is a fun job anyway!
Homemade Peppermint Patties
Ingredients
-
7 ½ cups powdered sugar
-
1/3 cup evaporated milk
-
1/3 cup honey*
-
3 tablespoons refined coconut oil**
-
2 teaspoons peppermint extract
-
24 ounces semi-sweet chocolate chips or chopped baking chocolate
-
Crushed candy canes for topping
-
Optional: light tasting oil for thinning the chocolate
Instructions
-
Using a stand mixer or a hand mixer on low, beat together sugar, milk, honey, coconut oil, and peppermint until combined. Add extra peppermint to taste. Divide dough in half, shape each half into a large disk, wrap with plastic wrap, and refrigerate for 30 minutes.
-
Sprinkle powdered sugar on a clean counter or rolling mat (like you usually would do with flour for sugar cookies). Roll out one of the dough disks to about ¼ - ½ inch thick and cut out 2 inch diameter patties using a circular cookie cutter or something of similar size (I used the top of a small glass). Gather excess dough and repeat process until all of it is used. Repeat for second half of dough. Arrange all patties in a single layer on parchment paper lined baking sheets. Place in freezer for at least 1 hour or overnight.
-
Once patties are cold, melt the chocolate in the microwave on medium power stirring every 30 seconds or on low heat on the stovetop. I remove the chocolate from the heat when there are still some chips left and stir until the rest of the chocolate melts the chips. This helps me avoid overheating the chocolate.
-
Balance patty on a fork and dip into chocolate. Use spatula to help cover the patty in chocolate. Lift patty out of chocolate and use spatula to remove excess chocolate from top and bottom of patty. Gently slide patty off fork onto a parchment paper lined cookie sheet. Sprinkle patty with crushed candy cane pieces before chocolate sets. Slide into refrigerator and let chocolate harden. Store patties in refrigerator. Patties are best served chilled.
Recipe Notes
*You can substitute corn syrup
**Mel says you can substitute olive oil or shortening, but I haven’t tried either












Food to Fitness
These look just so delicious. Great pics and an amazing recipe. Thanks!
Connie
Love your recipe. Would love your cauliflower soup recipe. Keep up the good work and like reading your stories
Karen
Hi Connie! Thank you so much for your kind words 🙂 Happy New Year!